
Panels
Create and open
Open Home → Panels and choose New panel to open a separate designer. Select a name to open its runtime window, where the layout is view-only. Edit, rename or delete the selected panel with the manager toolbar. Multiple panels can stay open; the window title menu switches between docked, floating and separate windows.
Panel names, canvases, controls, images and bindings are stored in separate .blpanel files. The .blproj project records their paths. Saving the project writes modified panel files. Embedded panels in older projects migrate to separate files on save.
Import and export
Choose Import panel in the panel manager and select a BeiniLink .blpanel file, a CANoe .xvp file, or a BeiniLink .blproj project. Import adds panels, appends a number for duplicate names and marks the project as modified.
Importing .blproj adds all its panels, linked panels and user variable definitions. Existing variables with the same full name and value type are reused; type conflicts reject the import. Variable bindings and Open panel button targets are updated to the imported IDs. Stop measurement before adding variables. The current project's hardware and database settings remain in use.
Select a panel and choose Export panel to create a separate .blpanel XML file containing its layout, controls, images, bindings, HTML and inline scripts. The project references panel file paths, so keep those files with the project when moving it. Before importing an .xvp file with system variable bindings, import its .vsysvar file.
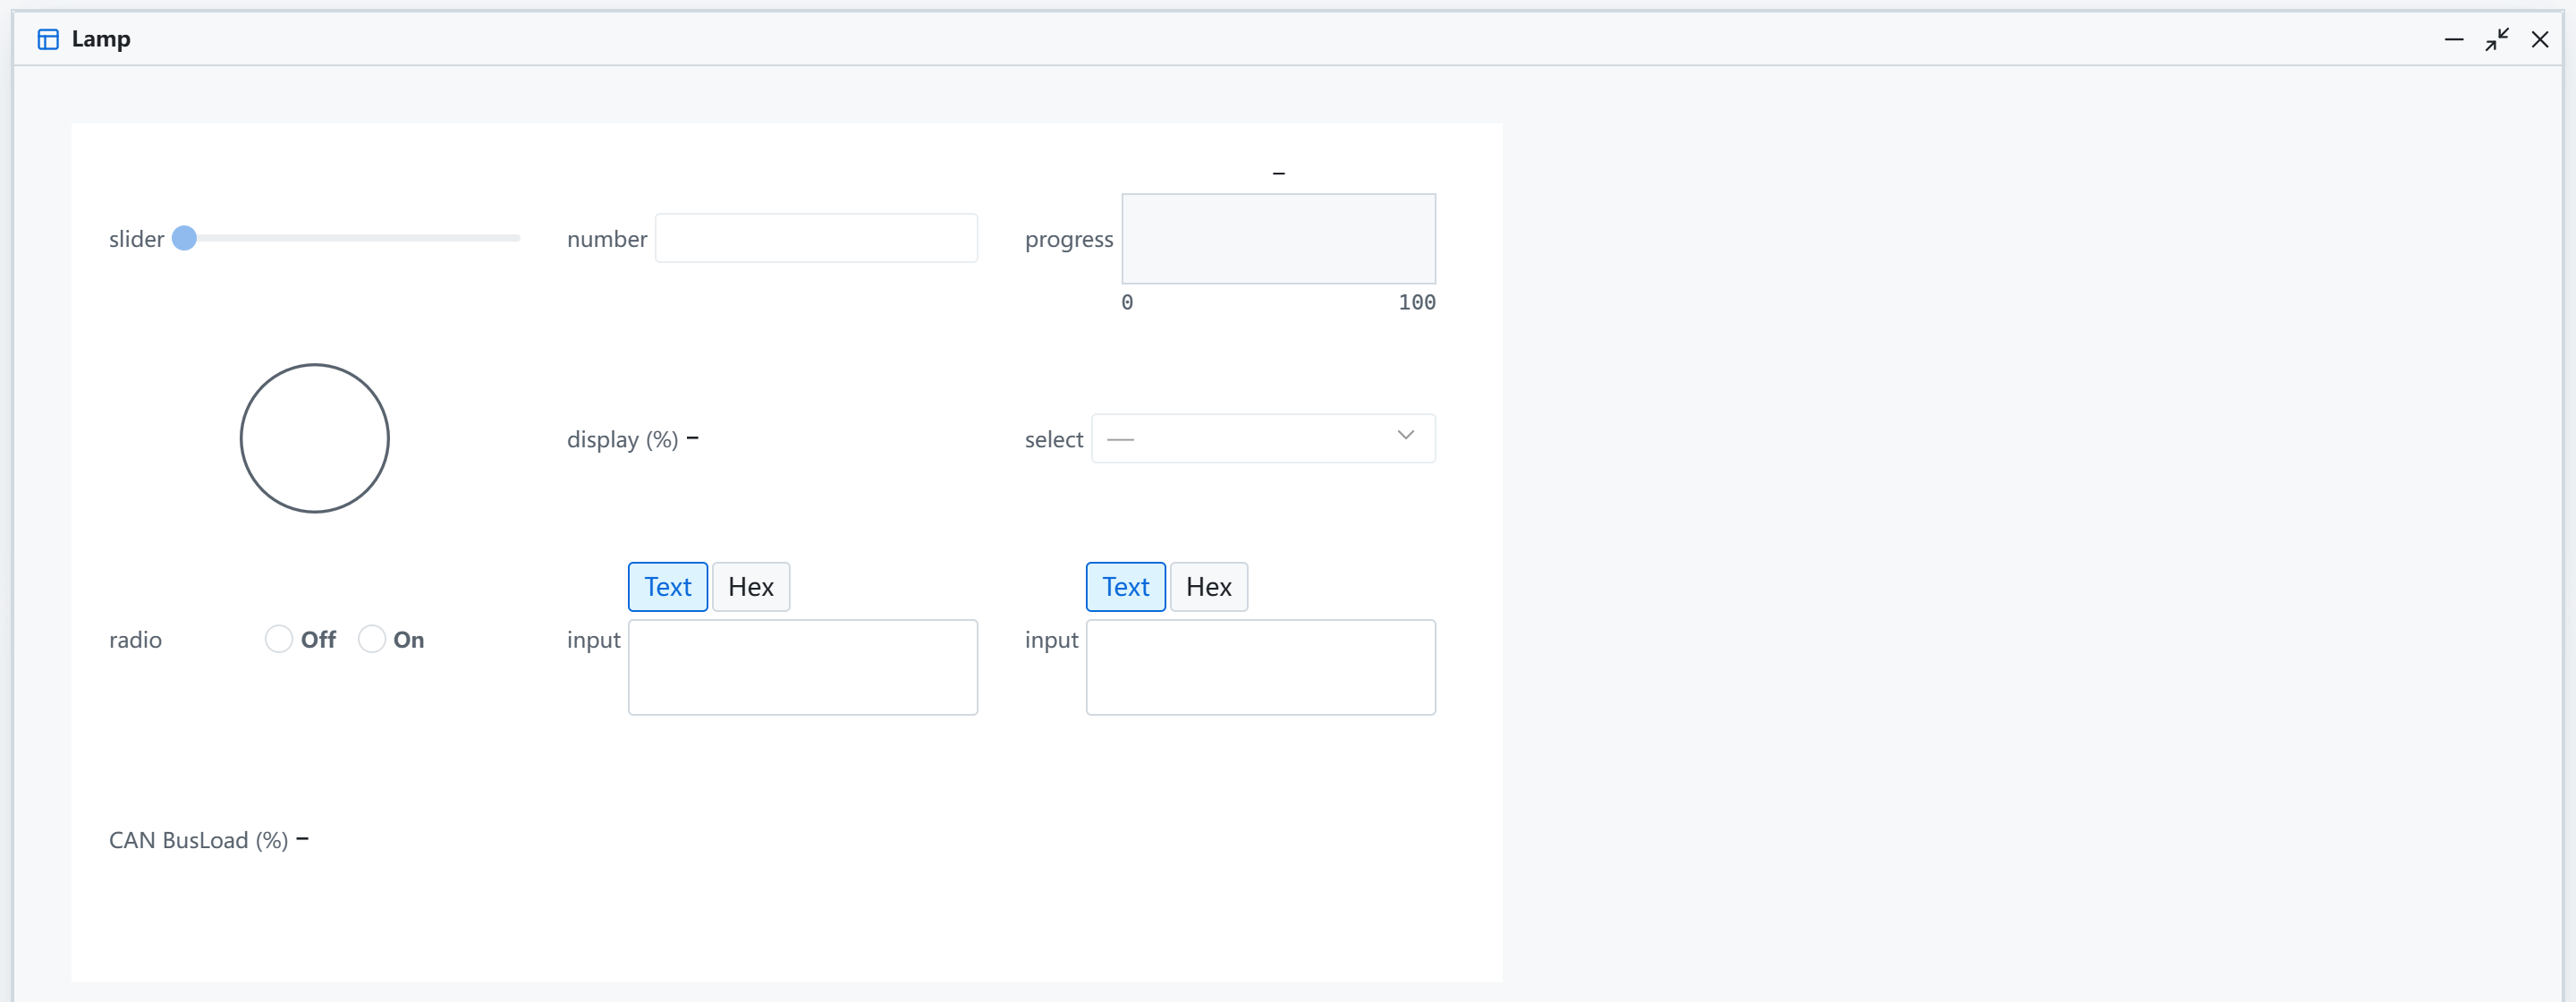
A panel shows controls bound to signals and variables. Sample data.
Edit the layout
Select a panel in the manager and choose Edit to open the same separate designer used by New panel. The library provides text, displays, numeric inputs, Hex/Text editors, paths, checkboxes, radio groups, buttons, measurement controls, switches, LEDs, sliders, selects, progress bars, gauges, images, groups, tabs and HTML.
The left sidebar has Components, Layers and Data tabs. Click a component to add it, or drag it to a canvas position. Dropping into a group or tab container uses its current page. Drag controls to move them and use any of the eight edge/corner handles to resize. Properties also support coordinates, dimensions, font, color and numeric settings.
Drag from blank canvas to select a rectangle. Shift or Ctrl click adds or removes controls from the selection. Move multiple controls together; align, distribute, match dimensions or group siblings with the toolbar. Select and reparent controls in Layers or change their container/page in Properties. Each completed gesture creates one undo entry.
Resize either sidebar with its divider or focus the divider and use the arrow keys. With nothing selected, Properties edits the panel name and canvas dimensions. The status bar shows selection counts, snapping and zoom. Snapping displays alignment guides. Zoom offers 50%, 75%, 100%, 125%, 150% and 200%, also available with Ctrl+wheel. Sidebar widths stay on this computer; zoom does not alter document coordinates.
Runtime panels display the canvas at its original size without zoom. Scroll to view content outside the window.
Resize the canvas with its right, bottom or bottom-right handle. Snapping uses 8-unit steps; the minimum size is 160 and existing controls must remain inside. Release to create one undo entry, or press Escape to cancel the drag.
Moving a container moves its children. Locked controls and containers cannot be moved or edited until unlocked. Tabs support adding, renaming, deleting and selecting the default page. Unlock a page's locked children before deleting the page.
Undo/redo uses the toolbar, Ctrl+Z or Ctrl+Y. Duplicate with Ctrl+D and delete with Delete. The editor displays initial values. Preview lets you try controls locally and clears trial values on exit; it does not change real variables, transmit bus data, or perform file and measurement actions. Save applies the edited document to the project; save the project file afterward. Closing its workspace window, deleting the panel or closing the project prompts to save, discard or cancel unsaved panel edits.
Bind and write
In Data, search and filter signals or variables. Double-click or press Enter to add a bound display. Drop a source on blank canvas to add a display there, or on a compatible control to rebind it. Text, images and HTML controls ignore binding drops. Incompatible sources report an error in Write.
Select a compatible DBC signal, LDF signal, user variable or system variable with Binding. The first variable binding fills limits, units and enum options. Displays show enum names; selects and radio groups use those options. Missing sources show a dashed border.
In the editor, bound controls show V for variables or S for signals at the top right. Hover to see the binding name. Missing bindings use a red mark.
Writable controls operate during measurement. Signal writes update the message's simulation payload and its running bus slot when the relevant node simulation is active. Existing node, message and schedule settings continue to govern transmission. System variables remain read only.
Numeric inputs support decimal, hex, binary, physical/raw values and alarm colors. Hex/Text editors edit strings and byte arrays. LEDs provide six shapes, explicit on/off values and colors. Progress bars offer direction, origin, percentages, value position and limits. Gauges use the configured range and units.
Buttons and files
Buttons can write press/release values, toggle, start or stop measurement, open another project panel or open a file. Supported file targets are folders, PDF, text, CSV and common image formats. Path controls write file, folder or save paths into string variables.
Selected images are embedded in the project.
HTML controls
Add HTML from the library and edit the HTML and Script text areas in Properties. Both are saved in the project. HTML accepts a fragment with inline styles; Script accepts JavaScript without a script tag. Edit mode does not execute Script. Preview may read data but cannot write variables or signals.
The isolated iframe cannot access the parent DOM, Node.js, the network or external scripts. Use the asynchronous panel API to communicate. Writes require measurement to be running and the control not to be read only:
<button id="raise">50%</button><span id="level"></span>(async () => {
const display = value => document.querySelector('#level').textContent = value;
display(await panel.getVar('Lamp.Level'));
const unsubscribe = await panel.onVar('Lamp.Level', display);
document.querySelector('#raise').onclick = async () => {
try { await panel.setVar('Lamp.Level', 50); }
catch (error) { display(error.message); }
};
window.addEventListener('unload', unsubscribe);
})();panel.getSignal(name) returns { name, value, rawValue, physicalValue }. panel.setSignal(name, value) accepts a finite raw number or a physical value/enum label string and follows the panel simulation rules. panel.onSignal(name, callback) and panel.isRunning() are also available. Await subscriptions to obtain their unsubscribe function. Unmounting also removes subscriptions automatically.
Use the naming rules in PC Scripts. Variables match full names first, then unique leaf names. .blproj imports include user variable definitions. Configure any required signal databases and external PC scripts in the current project. Inline styles control HTML colors; the application does not restyle page content automatically.